Basic Machine Maintenance Starts With a Simple Routine
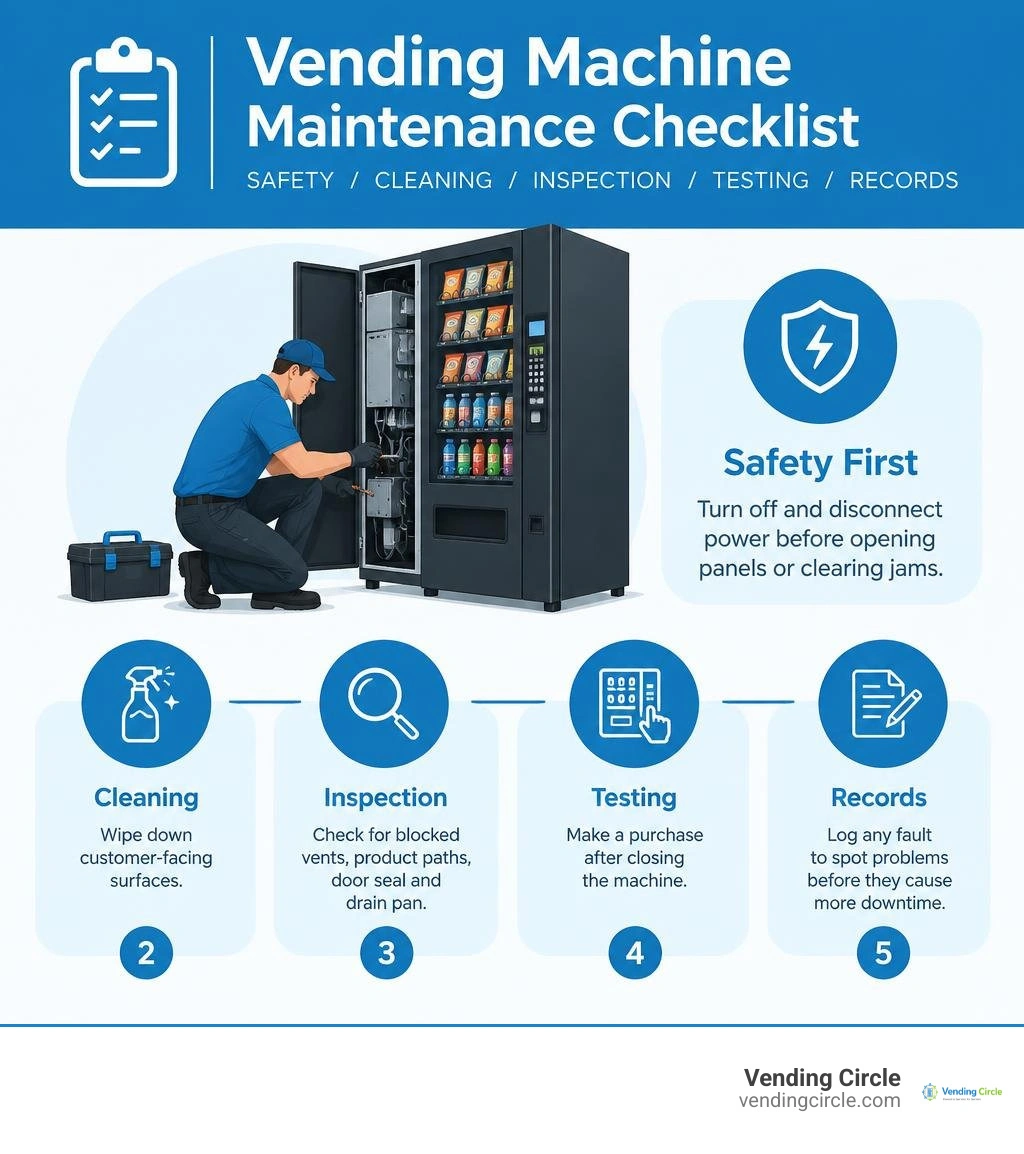
The easiest way to handle machine maintenance is to repeat a short checklist at every service visit: Turn off and disconnect power before opening service panels or clearing jams. Wipe down customer-facing surfaces, check for blocked vents and product paths, inspect the door seal and drain pan, then test a purchase after closing the machine. Record any fault so you can spot a problem before it causes more downtime.
I’m Manuel Mojica, founder of Vending Circle and former owner of MM Healthy Vending. That operator experience shapes this guide to machine maintenance: practical steps you can use across a busy route.
Safety Protocols and Essential Machine Maintenance Preparation
Before touching a single mechanical part or reaching into a cabinet, you must treat equipment safety as your top priority. Routine upkeep protects your capital investment, but cutting corners on safety puts you at risk of severe shock, pinch-point injuries, or accidental fires.
Always disconnect the main power plug before servicing internal hardware, clearing stubborn spiral jams, or removing protective guards. Never rely solely on a cabinet rocker switch to isolate electricity, as line-voltage wires behind the power panel remain energized. In commercial and public environments, apply lockout/tagout (LOTO) padlocks and warning tags to the power source if you must step away from an open machine.
Modern refrigerated units frequently use eco-friendly hydrocarbons like R290 (propane). While excellent for the environment, R290 is flammable. When servicing hydrocarbon-charged equipment, ensure your work area is well-ventilated, post a clear warning sign, keep a fire extinguisher nearby, and eliminate all ignition sources. When dealing with deeper board diagnostics, motor wiring faults, or harness shorts, review proper protocols for machine electrical repair to avoid component damage. Consult your equipment's Operator Safety and Technical Manual for model-specific safety clearances before disassembling internal assemblies.
Electrical Grounding and Pre-Service Safety Checks
Every commercial vending machine demands a dedicated, three-wire grounded electrical receptacle protected by a working Ground Fault Circuit Interrupter (GFCI). Never bypass the ground pin on a three-prong plug using a cheater adapter, and never connect grounding wires to plumbing or water pipes.
Extension cords are strictly prohibited. Using an undersized extension cord causes voltage drops that strain compressor motors, leading to blown start capacitors and premature compressor burnout. Before running diagnostic cycles, verify your outlet voltage using a digital multimeter. Commercial machines typically operate on single-phase 115-volt to 120-volt AC power at 60 Hz, requiring a stable range between 103 volts and 127 volts. Voltage outside this window causes erratic vending controller behavior and motor stalls.

Recommended Cleaning Schedule and Refrigeration Upkeep
A clean machine generates higher foot-traffic sales and prevents mechanical wear. Dust, spilled soda syrups, and ambient grime create friction in delivery chutes and insulate electrical components, causing them to overheat.
Wipe down the machine’s exterior monthly using a microfiber cloth and a mild, neutral detergent diluted in warm water. Avoid abrasive scrub pads, organic solvents, industrial paint thinners, or harsh alkaline cleaners. These substances strip powder coatings, turn clear polycarbonate display windows cloudy, and degrade rubber trim.
Maintaining proper exterior positioning is equally critical. Ensure your machine sits on a flat, level surface with at least 3 to 4 inches of clearance between the back panel and the wall. Without this physical gap, hot discharge air recirculates back into the refrigeration compartment, driving up power bills and overworking the compressor. When maintaining cold-drink equipment, following established best practices for coke machine maintenance keeps cooling decks operating reliably. Refer to the manufacturer's Commercial Cleaning and Maintenance Guide to establish an effective cleaning rotation.
| Component | Cleaning Frequency | Action Required | Recommended Tool / Agent |
|---|---|---|---|
| Cabinet Exterior & Glass | Monthly | Wipe down dust, fingerprints, and grime | Microfiber cloth, diluted neutral detergent |
| Condenser Coils & Fan | Every 3 Months | Remove lint, pet hair, and airborne dirt | Stiff non-metallic brush, vacuum, coil fin comb |
| Delivery Chute & Bin | Monthly | Sanitize contact surfaces and wipe syrup | Food-safe antibacterial wipe, warm water |
| Coin Mechanism & Validator | Every 3 to 6 Months | Clean optical lenses and remove debris | Isopropyl alcohol wipe, compressed air can |
| Evaporator Drain & Pan | Every 6 Months | Flush algae buildup and empty standing water | Warm water with mild bleach, pipe cleaner brush |
| Door Gaskets & Hinges | Semi-Annually | Inspect seal integrity and lubricate pivot pins | Silicone-based lubricant, damp cotton cloth |
Routine Machine Maintenance for Condensers and Evaporator Coils
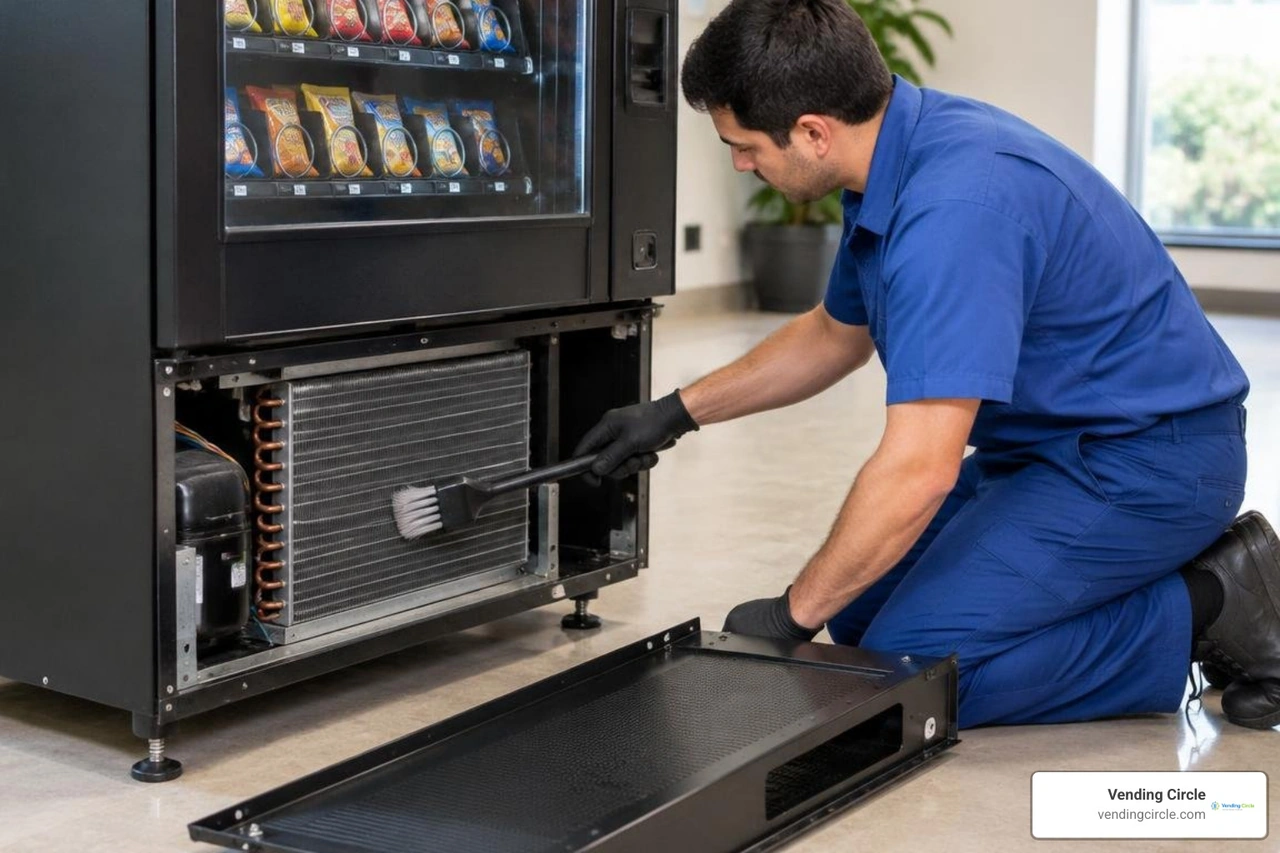
The refrigeration deck is the hardest-working subassembly in any cold merchandiser. Over time, the condenser fan pulls ambient dust, lint, and floor sweepings straight into the condenser coil fins. Left unchecked, this debris blanket acts as a thermal barrier, blocking heat transfer and forcing the compressor to run continuously.
To clean the coils:
- Disconnect machine power completely.
- Remove the lower front kick plate or rear access grille.
- Use a stiff, non-metallic bristle brush to sweep away dust along the direction of the aluminum fins. Never use metal wire brushes, which bend the delicate fins.
- Vacuum away loosened debris, or blow compressed air outward through the fins from the fan side.
- Inspect the evaporator coil inside the insulated cabinet for frost buildup, ensuring the automatic defrost cycle and timer operate properly.
- Check the evaporator drain line. Clear out gelatinous slime or algae using a flexible tube brush, then confirm that defrost water flows freely into the lower condensation drain pan without overflowing onto cabinet electronics.
Keeping these components clean is essential for optimizing vending machine energy efficiency and saving hundreds of dollars per unit in annual electricity costs.
Door Seals, Gaskets, and Locking Mechanisms
A damaged door gasket allows humid room air to seep into the refrigerated compartment. This constant air leak leads to thick frost buildup on the evaporator coils, higher internal temperatures, and spoiled perishables.
Inspect the perimeter rubber gasket every six months for splits, hardening, or mold. Test the door seal using the "dollar bill test": close the vending door on a dollar bill at various points along the top, sides, and bottom frame. If you can pull the bill out with zero resistance, the gasket is failing to compress properly or the door latch requires adjustment.
Keep door hinges aligned so the heavy glass door closes square against the cabinet frame without sagging. Apply a dry silicone-based lubricant to hinge pivot pins and T-handle lock screw threads. Avoid petroleum-based greases that attract airborne dirt and gum up lock tumblers.
Mechanical, Payment, and Electronic Component Calibration
Vending machine electronics rely on precise optical alignment, consistent voltage, and accurate sensor feedback. When a payment peripheral acts up, frustrated customers walk away, resulting in immediate revenue loss.
Clean bill validator optical paths and magnetic heads every three to six months using a validator cleaning card or a lint-free cloth dampened with isopropyl alcohol. Empty and inspect coin changer payout tubes, removing bent coins, metal shavings, or sticky residue that cause change-dispense jams. Prime the coin tubes by manually running test acceptance and payout routines through the service menu.
If your machine uses older fluorescent cabinet lighting, replace burned-out tubes within 24 to 48 hours. A failed fluorescent lamp can continuously draw strike voltage through the ballast, overheating and destroying the ballast module.
When upgrading cash-only machines with modern telemetry hardware, follow tested troubleshooting steps when adding a card reader to a vending machine to establish proper multi-drop bus (MDB) communication. For detailed wiring and protocol setups, review our comprehensive vending machine card readers guide.

Controller Battery and Power Cycle Management in Machine Maintenance
Most vending machine main control boards (VMC) rely on an onboard lithium backup battery (typically a CR2032 coin cell or a soldered lithium-thionyl cylinder) to preserve RAM memory when the machine is unplugged. This memory chip stores pricing configurations, space-to-sales column mappings, audit data, and internal clock settings.
If this backup battery drops below 2.8 volts DC, the control board will lose its memory during a temporary power outage or route relocation. When powered back on, the machine may revert to factory default prices (often $0.00 or $99.95) or lock up with a memory error.
Test the battery voltage with a multimeter during your annual inspection. When replacing a socketed coin-cell battery, turn on the machine's primary power first if the manufacturer manual permits it, or record your programming settings on paper so you can restore them if memory clears during the swap.
Calibrating Load Cells and Inventory Scales
Smart micro-market coolers and weight-sensing merchandisers use sensitive load-cell arrays under each shelf to determine which product a customer removed. Over time, mechanical vibration, shelf flexing, and product drops cause these sensors to drift out of calibration.
To calibrate load cells accurately:
- Access the technician service menu and select the scale calibration interface.
- Clear all inventory from the shelf and trigger the "Zero / Tare" routine.
- Place a certified reference test weight (such as a 500-gram or 1000-gram calibration puck) onto the center of the shelf plate.
- Confirm that the digital readout matches the reference weight within the specified tolerance (typically within ±1 to 2 grams).
- Move the calibration weight across the front, back, and corners of the tray to verify multi-point balance and identify twisted mounting brackets.
Keeping weight sensors properly calibrated prevents false inventory deductions and phantom charges, simplifying your day-to-day work with streamlining automated vending machine inventory management.
Troubleshooting Common Machine Failures and Loading Best Practices
Many service calls can be resolved quickly on-site with systematic troubleshooting. When a customer reports a broken machine, use this step-by-step diagnostic workflow:
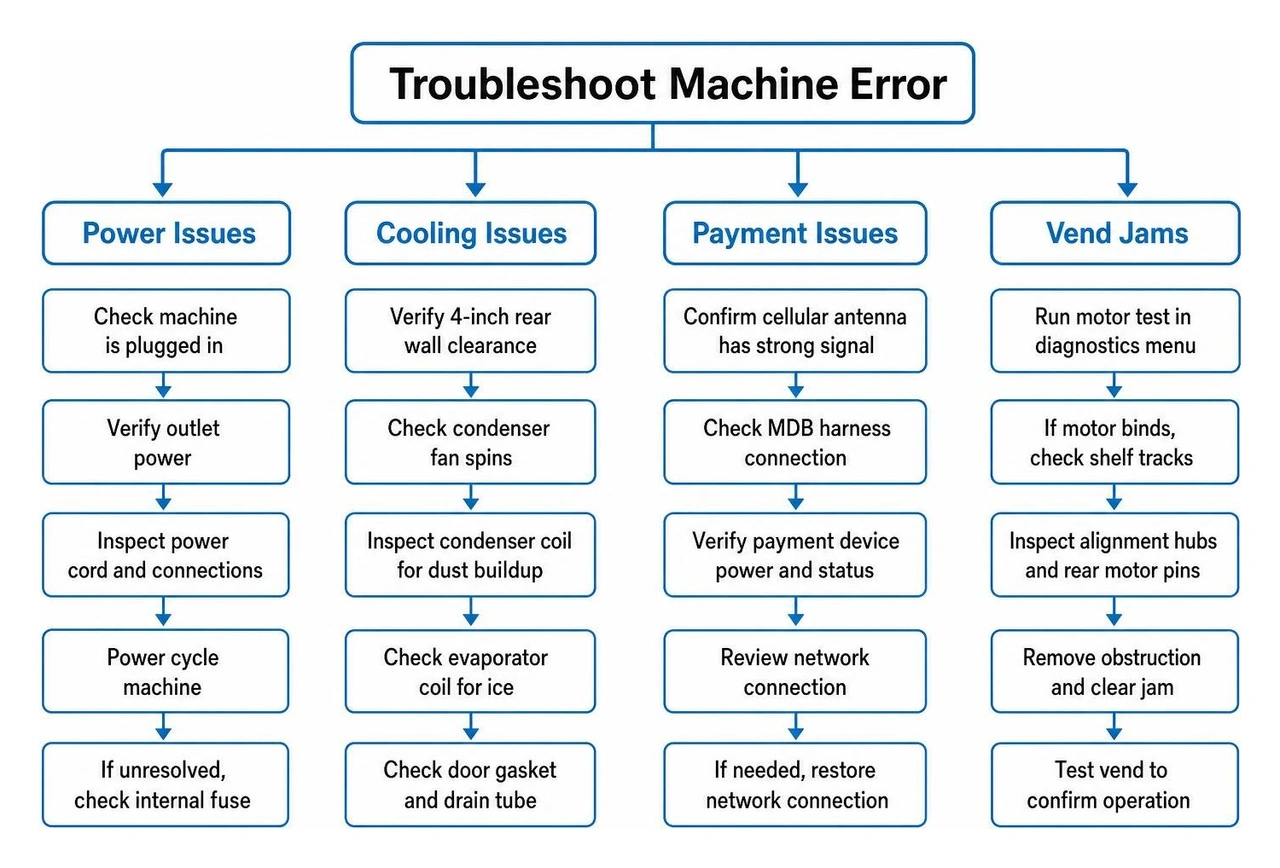
- Machine Not Cooling: Check that the rear cabinet has the required 4-inch wall clearance and that the condenser fan spins freely. Feel the compressor: if it is scalding hot and clicking on its thermal overload protector every few minutes, the condenser coil is choked with dust or the run capacitor has failed. If the compressor hums smoothly but the cabinet stays warm, inspect the evaporator coil for heavy ice blockages or check for refrigerant loss.
- Excessive Ice Buildup: Ice blocks on the evaporator indicate that outside air is leaking through a torn door gasket, the defrost termination switch has failed, or the internal evaporator drain tube is clogged with algae, trapping condensate inside the airflow path.
- Card Reader Offline or Payment Gateway Errors: Confirm the cellular antenna has strong signal reception and is not shielded behind metal walls. Check the MDB harness connection to the main board. If cellular transmission drops frequently, review our guide to restoring vending machine network connection to resolve antenna issues.
- Vend Motor Errors and Spiral Jams: Test the motor rotation through the internal diagnostics menu. If the motor turns but binds, check for bent shelf tracks, broken alignment hubs, or misaligned rear motor pins.
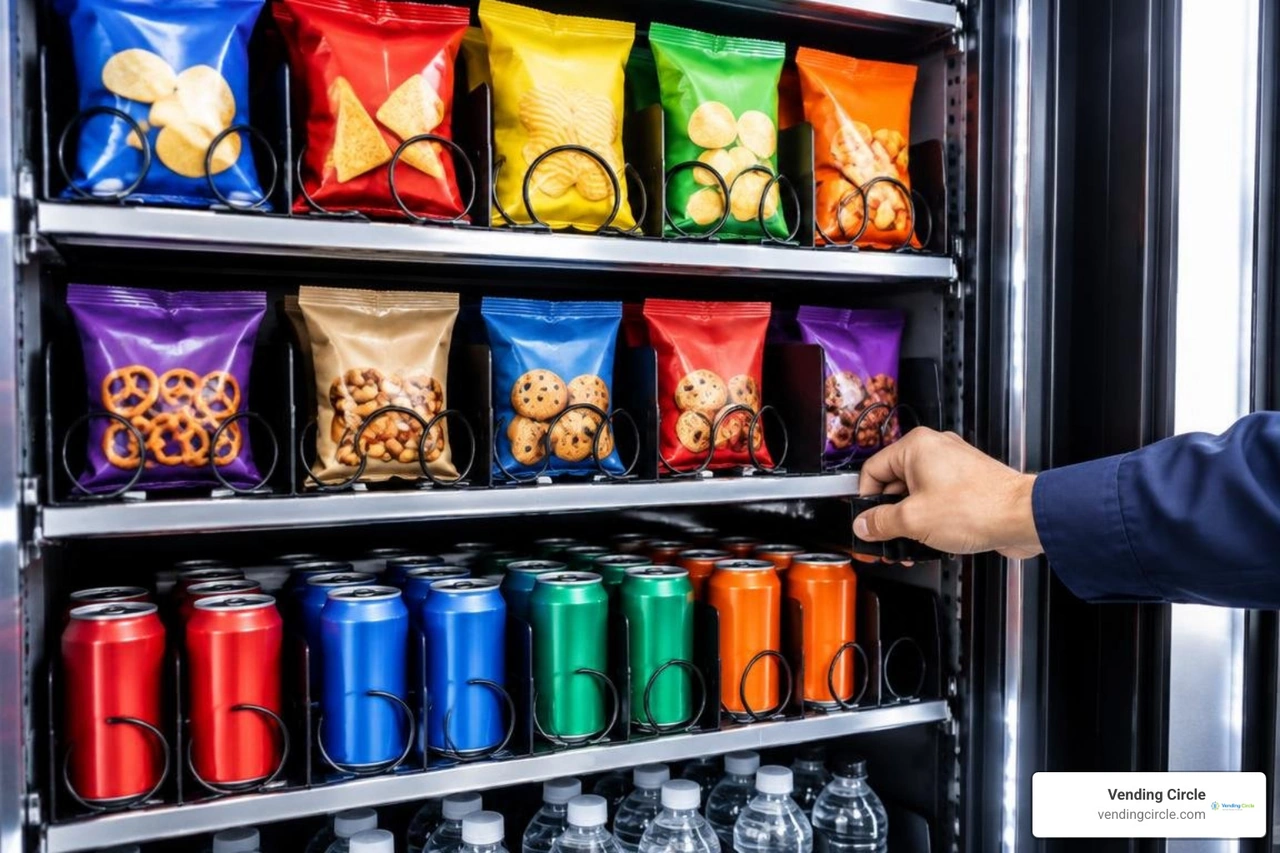
When loading inventory:
- Leave at least 3 inches of clearance at the top of can columns and snack shelves to prevent product binding during delivery cycles.
- Never push bottles or snack bags tightly into coils; select spiral pitches that match the product package thickness.
- Make sure product packaging does not block interior air circulation louvers. If high-demand items run dry unexpectedly, follow best practices for handling supply shortages with vending machine emergency restock to keep top-selling slots active.
Standard Vending Machines vs. Frozen Food and Ice Merchandisers
Maintaining standard beverage and snack machines differs significantly from managing low-temperature frozen merchandisers and commercial ice baggers. Frozen units operate in extreme sub-zero temperature bands (-10°F to 0°F / -23°C to -18°C), placing unique demands on defrost heaters, cabinet seals, and drainage systems.
| Feature / System | Standard Ambient / Drink Vender (35°F to 45°F) | Frozen Food & Ice Merchandiser (-10°F to 0°F) |
|---|---|---|
| Defrost Mechanism | Off-cycle or short timed electric defrost; minimal frost accumulation | Heavy-duty electric defrost heaters or hot-gas bypass; runs 3 to 4 times daily |
| Door Perimeter Seals | Standard magnetic compression rubber gasket | Electrically heated perimeter gaskets to prevent condensation and freeze-shut doors |
| Condensation Management | Gravity drain pipe running to unheated lower pan | Electrically heated drain trough and heated drain lines to stop ice plugs |
| Delivery Chute Design | Simple gravity drop door with mechanical flap | Insulated, spring-loaded thermal trapdoors with anti-frost perimeter seals |
| Compressor Duty Cycle | Moderate back-pressure commercial compressor | High-displacement low-temp compressor; higher power draw and sensitive startup |
For specialized ice-vending hardware with internal water supply lines, regular descaling and sanitization are essential. Learn the proper steps for servicing the ice machine water pump to prevent scale buildup and avoid pump motor burnout. When servicing frozen reach-in merchandisers, refer directly to the Vending Merchandiser Installation and Service Manual for safe handling of high-capacity auto-defrost controls.
Frequently Asked Questions About Machine Maintenance
How often should condenser coils be cleaned on a vending machine?
Condenser coils and fans should be thoroughly cleaned at least once every three months. In locations with high foot traffic, nearby exterior doors, warehouses with forklift dust, or spaces with pet hair, inspect and brush the coils monthly. Keeping the coils free of debris maintains proper heat exchange, prevents the compressor from overheating, and helps avoid costly emergency repairs.
Why is my refrigerated vending machine freezing up with excessive ice?
Excessive ice on the evaporator coil is usually caused by warm, humid air entering the cabinet. This happens when door gaskets are torn, the cabinet door is misaligned, or the delivery chute door fails to close tightly. It can also stem from a failed defrost timer, a defective defrost termination thermostat, or a blocked condensate drain line that traps standing water inside the cold airflow path.
What should I do if the vending controller loses its settings after a power cycle?
If your vending machine resets its product prices, configuration settings, or internal clock whenever the power goes out, the lithium backup battery on the main controller board is dead. Inspect the board for a CR2032 coin cell or a soldered cylinder battery. Replace the battery with a fresh unit, then reprogram your pricing and motor configurations through the service menu.
Conclusion
Mastering routine vending machine upkeep is the foundation of a reliable, high-earning route. By sticking to a strict maintenance routine—verifying ground safety, keeping condenser coils clean, checking door gaskets, calibrating payment systems, and loading trays correctly—you eliminate the root causes of over 75% of unexpected service breakdowns. Preventive care protects your equipment, keeps energy bills low, and ensures your machines consistently generate revenue.
Ready to take your operational knowledge to the next level? Explore our comprehensive resources on vending machine maintenance to access detailed service teardowns and technical guides. Join the Vending Circle community today to connect with experienced operators in weekly live Q&A sessions, access specialized operational courses, and take advantage of manufacturer-direct pricing discounts on parts and hardware!